
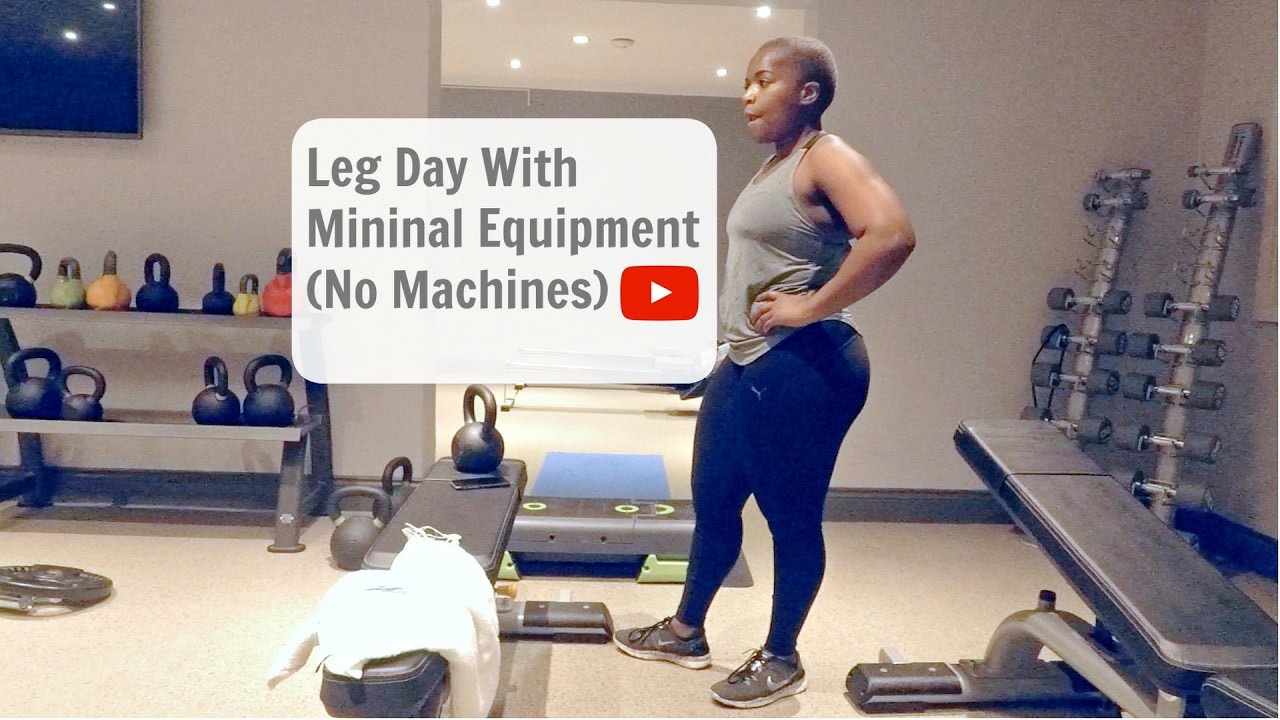
At home resistance training program with minimal equipment: ditch the expensive gym membership and embrace the glorious chaos of your living room! This program proves you don’t need fancy machines or a personal trainer to sculpt a superhero physique. We’re talking bodyweight brilliance, resistance band wizardry, and the surprisingly effective power of strategically placed water bottles. Get ready to unleash your inner fitness ninja, one surprisingly effective exercise at a time!
This guide will walk you through a comprehensive at-home resistance training program designed for all fitness levels. We’ll cover everything from choosing the right equipment (hint: you probably already have most of it!) to creating a workout schedule that fits your life, complete with dynamic warm-ups, killer exercises, and a cool-down that’ll leave you feeling relaxed and ready to conquer the world (or at least, the next load of laundry).
At-Home Resistance Training
Tired of expensive gym memberships and crowded workout spaces? Yearning for a physique that would make Michelangelo weep with joy? Then unleash your inner fitness warrior with the convenience and effectiveness of at-home resistance training! Forget the soul-crushing commute and awkward small talk with the guy who spends more time admiring himself in the mirror than actually lifting.
This program empowers you to sculpt your dream body in the comfort of your own home, proving that you don’t need fancy equipment or a personal trainer to achieve amazing results.At-home resistance training offers a plethora of benefits beyond simply saving you money. It provides unmatched flexibility; workout whenever your schedule allows, whether it’s before the kids wake up, during your lunch break, or after a long day of battling spreadsheets.
No more rushing to the gym before it closes or worrying about finding a parking spot. You’re in charge! Moreover, the intimate setting of your home fosters a comfortable and focused environment, minimizing distractions and maximizing your workout intensity. Say goodbye to judgmental stares and hello to sweat-fueled self-improvement!
Advantages of Minimal Equipment Workouts
This program utilizes readily available household items, turning everyday objects into powerful resistance tools. Forget expensive weight sets and complicated machines; we’ll transform your living room into a high-performance fitness studio using items you probably already own. Think water bottles for added weight, sturdy chairs for dips, and your own body weight for countless exercises. This approach is not only cost-effective but also incredibly versatile.
The simplicity of the equipment means you can easily adapt the exercises to your fitness level and gradually increase the intensity as you get stronger. For example, starting with bodyweight squats and progressing to weighted squats with filled water bottles illustrates the progressive overload principle that is key to muscle growth. This program is proof that less is often more when it comes to effective fitness.
Program Structure Overview
This at-home resistance training program is designed to be a progressive journey, carefully guiding you from beginner to fitness pro (or at least, significantly fitter pro!). It’s structured to build strength and endurance gradually, minimizing the risk of injury while maximizing results. Each workout session will consist of a dynamic warm-up, a series of carefully selected resistance exercises targeting various muscle groups, and a cool-down to promote recovery.
Check what professionals state about weight lifting program for building muscle and improving fitness and its benefits for the industry.
The program will focus on compound movements, which engage multiple muscle groups simultaneously, maximizing calorie burn and overall fitness gains. We’ll also incorporate rest days into the schedule to allow your body to repair and rebuild, preventing burnout and maximizing your progress. Think of it as a well-oiled machine; consistent effort and planned rest are vital for optimal performance.
Essential Equipment and Setup
Let’s face it, transforming your living room into a personal gym doesn’t require a small fortune or a Hercules-sized storage unit. With a little ingenuity and a dash of minimalist thinking, you can achieve surprisingly effective results. We’re talking about building muscle, improving endurance, and generally feeling like a superhero – all without breaking the bank or your back.This section will guide you through assembling the bare minimum equipment needed for a fantastic at-home resistance training program and setting up your workout space for optimal safety and efficiency.
We’ll also provide some clever storage tips to keep your makeshift gym looking tidy and preventing any accidental trips over rogue resistance bands.
Minimal Equipment List
The beauty of this program lies in its simplicity. You don’t need a mountain of equipment to see significant results. In fact, your body is already your best piece of equipment! However, adding a few inexpensive items will greatly enhance your workouts and allow for greater variety.
- Resistance Bands: These versatile tools come in various resistance levels, allowing you to progressively overload your muscles. Imagine them as your personal, portable weight set. They’re lightweight, compact, and can be used for a wide range of exercises, from squats and rows to bicep curls and lateral walks.
- Water Bottles: Not just for hydration! Filled water bottles can act as surprisingly effective weights for exercises like bicep curls, overhead presses, or even lunges. The added benefit? You’ll stay hydrated during your workout.
- Your Bodyweight: This is the ultimate piece of equipment, readily available 24/7. Think push-ups, squats, lunges, planks – the possibilities are endless, and the cost is zero!
Creating a Safe and Effective Workout Space
Safety first! Before you even think about flexing those biceps, you need a dedicated space free from clutter and hazards. A clear area of at least 6-8 feet square is ideal, allowing for enough room to move freely during your workout. Ensure the floor is even and stable to prevent slips and falls. Good lighting is essential, both to avoid strain on your eyes and to ensure you maintain correct form during exercises.
Consider a mirror to help monitor your posture and technique. Finally, choose a well-ventilated area to avoid overheating.
Equipment Organization and Storage
After your sweat session, the last thing you want is a chaotic mess of equipment. Efficient storage is key! A simple solution is a wall-mounted rack or a sturdy shelf to keep your resistance bands and water bottles organized and within easy reach. For smaller items, consider using a storage bin or container. Think vertical storage to maximize space and keep things tidy.
Remember, a clean and organized space fosters a more positive and productive workout environment. Plus, it prevents those frustrating moments spent searching for that elusive resistance band before your workout.
Warm-up Routine
Before we unleash your inner Arnold (minus the questionable fashion choices), let’s talk about the unsung hero of any workout: the warm-up. Think of it as the pre-game show before the main event – it gets your body ready to perform at its best and helps prevent those pesky injuries that can sideline your gains faster than a dropped weight.
A proper warm-up is crucial for preparing your muscles, increasing blood flow, and lubricating your joints, setting the stage for a successful and injury-free resistance training session.A dynamic warm-up, focusing on movement, is your best bet before resistance training. This type of warm-up increases your heart rate, raises your body temperature, and improves your range of motion, all without tiring you out before you even begin.
Remember to click best resistance band workout for strength and toning to understand more comprehensive aspects of the best resistance band workout for strength and toning topic.
We’ll focus on a 5-minute routine perfect for all fitness levels, easily adjustable for beginners and seasoned pros alike.
Five-Minute Dynamic Warm-up Routine
This routine involves a series of movements that mimic the actions you’ll be performing during your workout, but at a lower intensity. Remember, the goal is to prepare your body, not exhaust it. Listen to your body and adjust the intensity as needed. If something feels painful, stop and modify or skip it entirely.
- Arm Circles (Forward and Backward): 30 seconds each. Start with small circles, gradually increasing the size. Beginners can keep the circles smaller and perform fewer repetitions. Imagine you’re gently stirring a giant bowl of protein shake.
- Leg Swings (Forward and Sideways): 30 seconds each leg. Keep your core engaged and swing your leg smoothly. Beginners can perform smaller swings and hold onto a chair or wall for balance. Picture yourself mimicking a graceful flamingo.
- Torso Twists: 30 seconds. Keep your feet shoulder-width apart and gently twist your torso from side to side. Beginners can perform smaller twists or hold onto a stable object for balance. Think of yourself as a human metronome, keeping a steady rhythm.
- High Knees: 30 seconds. Bring your knees up towards your chest, increasing speed gradually. Beginners can march in place at a slower pace, focusing on controlled movements. Imagine you’re a determined robot marching to a victory parade.
- Butt Kicks: 30 seconds. Kick your heels up towards your glutes, increasing speed gradually. Beginners can perform slower kicks, focusing on form over speed. Visualize yourself as a super-powered kangaroo.
Importance of Warming Up Before Resistance Training
Warming up before resistance training is not just a suggestion; it’s a necessity. Skipping this crucial step significantly increases your risk of injury. A proper warm-up prepares your muscles and joints for the demands of weight training, improving flexibility, range of motion, and reducing the likelihood of strains, tears, or other injuries. It also increases blood flow to your muscles, delivering oxygen and nutrients needed for optimal performance.
Think of it as priming your engine before hitting the road – a smoother ride and a more efficient journey.
Bodyweight Exercises
Let’s ditch the fancy gym equipment and embrace the power of your own body! Bodyweight exercises are a fantastic way to build strength, endurance, and even improve your balance – all from the comfort of your living room (or wherever your personal workout sanctuary happens to be). No more excuses, just pure, unadulterated muscle-building goodness.Bodyweight training offers a surprisingly versatile approach to fitness.
By manipulating variables like repetitions, sets, tempo, and rest periods, you can continuously challenge your muscles and prevent plateaus. Remember, even the simplest exercises can become incredibly demanding with the right approach. Think of it as a constantly evolving challenge – your body is the weight, and the only limit is your determination.
Effective Bodyweight Exercises, At home resistance training program with minimal equipment
The following table Artikels several effective bodyweight exercises targeting major muscle groups. Remember to focus on proper form to maximize results and minimize the risk of injury. Think quality over quantity – a few well-executed repetitions are far better than many sloppy ones.
| Exercise Name | Target Muscle Group | Sets | Modifications |
|---|---|---|---|
| Squats | Quads, Glutes, Hamstrings | 3-4 sets of 8-12 reps | Beginner: Use a chair for assistance. Advanced: Add a jump at the top. |
| Push-ups | Chest, Triceps, Shoulders | 3-4 sets of as many reps as possible (AMRAP) | Beginner: Perform push-ups against a wall or on your knees. Advanced: Try decline push-ups (feet elevated). |
| Lunges | Quads, Glutes, Hamstrings | 3-4 sets of 10-12 reps per leg | Beginner: Perform stationary lunges. Advanced: Add a jump between lunges. |
| Plank | Core | 3-4 sets, hold for 30-60 seconds | Beginner: Shorten the hold time. Advanced: Try side planks or forearm planks. |
| Rows (using a sturdy table or chair) | Back, Biceps | 3-4 sets of 10-12 reps | Beginner: Use a lower table/chair for easier leverage. Advanced: Increase the incline of your body. |
| Glute Bridges | Glutes, Hamstrings | 3-4 sets of 15-20 reps | Beginner: Perform with feet flat on the floor. Advanced: Elevate your feet on a bench or chair. |
Proper Form and Execution
Maintaining correct form is paramount for both effectiveness and injury prevention. Imagine a mirror reflecting your perfect form; strive for that image with every repetition.* Squats: Stand with feet shoulder-width apart, toes slightly outward. Lower your hips as if sitting in a chair, keeping your back straight and chest up. Push through your heels to return to the starting position.
Avoid letting your knees cave inward.* Push-ups: Start in a plank position with hands slightly wider than shoulder-width apart. Lower your chest towards the floor, keeping your body in a straight line. Push back up to the starting position. Engage your core throughout the movement.* Lunges: Step forward with one leg, bending both knees to 90 degrees.
Ensure your front knee doesn’t extend past your toes. Push off with your front foot to return to the starting position. Alternate legs.* Plank: Hold a position similar to a push-up, but resting on your forearms instead of your hands. Keep your body in a straight line from head to heels, engaging your core muscles.* Rows: Lean forward, placing your hands on a sturdy surface (table, chair).
Keep your back straight and core engaged. Pull your chest towards the surface, squeezing your shoulder blades together. Slowly lower back to the starting position.* Glute Bridges: Lie on your back with knees bent and feet flat on the floor. Lift your hips off the floor, squeezing your glutes at the top. Slowly lower your hips back down.
Progressive Overload Techniques
To continuously challenge your muscles and see results, you need to progressively overload your bodyweight exercises. This doesn’t necessarily mean adding more weight – it’s about increasing the challenge in other ways.* Increase Repetitions: Gradually increase the number of repetitions you perform for each set.* Increase Sets: Add an extra set to your workout routine.* Decrease Rest Time: Reduce the rest period between sets to increase the intensity.* Increase Tempo: Slow down the tempo of each repetition, focusing on the eccentric (lowering) phase of the movement.
For example, a 3-second lowering phase and a 1-second lifting phase.* Increase Difficulty: Progress to more challenging variations of the exercises (e.g., moving from knee push-ups to standard push-ups, from regular squats to jump squats).
Resistance Band Exercises
Resistance bands: the unsung heroes of the at-home workout world! They’re cheap, cheerful, and surprisingly versatile, capable of transforming your living room into a fully-fledged gym. Forget those bulky dumbbells – we’re going to unleash the power of the rubbery resistance!Resistance bands come in various strengths, typically indicated by color-coding (though this can vary by brand, so always check the manufacturer’s guide).
Lighter bands offer lower resistance, ideal for beginners or for higher rep exercises, while heavier bands provide a more intense workout for strength building. Choosing the right band depends on your fitness level and the specific exercise. Start with a lighter band and progress to heavier ones as you get stronger. Don’t be afraid to experiment to find what feels right for you; a slight burn is good, but agonizing pain is a sign to dial it back.
Resistance Band Exercises by Muscle Group
This section Artikels a selection of resistance band exercises, categorized for your convenience. Remember to maintain proper form throughout each exercise to maximize results and minimize the risk of injury.
- Chest: Chest presses (lying down or standing), flyes (lying down or standing). Imagine a superhero flexing their pecs – that’s the goal! Visualize yourself pushing against a powerful force. For added intensity, try performing these exercises with your feet anchored, providing a more stable base and increased resistance.
- Back: Rows (seated or standing), pull-aparts (great for upper back). Picture yourself pulling a stubborn donkey cart uphill – that’s the kind of strength we’re aiming for. You can also incorporate resistance band pull-aparts into your warm-up routine for a dynamic stretch and activation of your back muscles.
- Shoulders: Lateral raises, front raises, overhead presses. Imagine yourself lifting a giant rubber chicken – with impressive control and precision, of course. The controlled movement is key here; avoid jerky movements to prevent injury.
- Biceps: Bicep curls (hammer curls and standard curls). Channel your inner bodybuilder – but remember to focus on controlled movements rather than simply swinging the weight. A slow, controlled curl will work your biceps more effectively.
- Triceps: Overhead triceps extensions, kickbacks. Think of your triceps as the powerful springs that launch a catapult – strong and resilient. Focus on the squeeze at the top of the movement to fully engage the triceps muscles.
- Legs: Squats (band around thighs), lunges (band around thighs or ankles), glute bridges (band around thighs). Visualize yourself conquering a mountain – one powerful step at a time. For a truly intense leg workout, combine resistance bands with bodyweight exercises for an amplified challenge.
Incorporating Resistance Bands into Bodyweight Exercises
Adding resistance bands to your favorite bodyweight exercises is a fantastic way to ramp up the intensity. Simply loop the band around your thighs, ankles, or wrists, depending on the exercise. This adds an extra layer of resistance, making familiar exercises feel significantly more challenging. For example, adding a resistance band to squats significantly increases the difficulty, targeting your quads, glutes, and hamstrings more effectively.
Similarly, adding a band to push-ups increases the resistance, emphasizing your chest, shoulders, and triceps. The possibilities are endless – get creative and experiment!
Resistance Band Selection
Choosing the right resistance band is crucial for an effective and safe workout. Lighter bands (often yellow or red) are suitable for beginners and higher repetitions, while heavier bands (often green, blue, or black) are ideal for building strength and power. Remember that the color coding can vary between brands. Always check the band’s packaging for its resistance level, usually measured in pounds or kilograms.
It’s better to start with a lighter band and gradually increase the resistance as you get stronger. Think of it as a gradual ascent – a steady climb to fitness greatness!
Workout Schedule and Progression

So, you’ve conquered the equipment list and mastered the warm-up – congratulations, resistance warrior! Now, let’s craft a workout schedule that’ll sculpt you into a lean, mean, at-home fitness machine. Remember, consistency is key, not intensity. We’re building a sustainable habit, not a one-week wonder.This four-week program provides a framework. It’s not set in stone – think of it more as a delicious, adaptable recipe than a rigid instruction manual.
Feel free to swap exercises, adjust rest times, and generally tweak things to suit your own magnificent body and its unique needs.
Sample Four-Week Workout Schedule
This schedule alternates between upper and lower body workouts, allowing for adequate rest and recovery. Remember to listen to your body and take rest days when needed. Overtraining is the enemy of progress, and we’re aiming for long-term gains, not short-term burnout.
| Week | Monday | Tuesday | Wednesday | Thursday | Friday | Saturday | Sunday |
|---|---|---|---|---|---|---|---|
| 1 | Upper Body (Bodyweight & Bands) | Rest | Lower Body (Bodyweight) | Rest | Upper Body (Bodyweight & Bands) | Rest | Active Rest (light cardio) |
| 2 | Lower Body (Bodyweight & Bands) | Rest | Upper Body (Bodyweight) | Rest | Lower Body (Bodyweight & Bands) | Rest | Active Rest (yoga or stretching) |
| 3 | Full Body (Bodyweight & Bands) | Rest | Full Body (Bodyweight & Bands) | Rest | Rest | Active Rest (walk in nature) | Rest |
| 4 | Upper Body (Bodyweight & Bands – increased reps/sets) | Rest | Lower Body (Bodyweight & Bands – increased reps/sets) | Rest | Full Body (Bodyweight & Bands – increased intensity) | Rest | Active Rest (foam rolling and stretching) |
Adjusting the Workout Schedule
Individual fitness levels and goals significantly impact the workout schedule’s intensity and duration. Beginners should focus on proper form and gradually increase reps and sets. More advanced individuals can increase the intensity by adding more sets, reps, or using heavier resistance bands. Consider adding advanced variations of exercises as you progress. For example, progressing from standard push-ups to incline push-ups, decline push-ups, or even plyometric push-ups.
Similarly, squats can progress to jump squats or pistol squats (with assistance if needed).
Tracking Progress and Program Adjustment
Tracking progress is crucial for motivation and ensuring the program remains challenging yet achievable. Consider using a workout journal or a fitness app to record sets, reps, and weight used (or band resistance level). Take photos or measurements (chest, waist, etc.) to monitor physical changes. If you’re not seeing progress after a few weeks, consider adjusting the program.
This might involve increasing the intensity (more reps, sets, or resistance), incorporating more challenging exercises, or reducing rest periods. Alternatively, if you’re experiencing excessive fatigue or pain, reduce the intensity or take additional rest days. Remember, consistency and listening to your body are paramount. It’s a marathon, not a sprint (unless you’re doing sprints – then it’s a sprint!).
Cool-down and Stretching

After a grueling resistance training session, your muscles are probably screaming for mercy (in a good way, hopefully!). Ignoring their pleas and collapsing onto the sofa might seem tempting, but trust us, a proper cool-down and stretching routine is the unsung hero of your fitness journey. Think of it as the post-workout massage your muscles desperately crave, but without the hefty price tag.Stretching after resistance training is crucial for a number of reasons.
It helps to gradually reduce your heart rate and blood pressure, preventing a sudden drop that could leave you feeling lightheaded. More importantly, it improves muscle recovery, reduces muscle soreness (that dreaded DOMS!), and increases your flexibility. Think of your muscles like a tightly wound spring; stretching helps to gently unwind them, preventing stiffness and improving your overall range of motion.
Static Stretching Routine (5 Minutes)
The following table Artikels a 5-minute static stretching routine. Remember to hold each stretch for 30 seconds, focusing on a gentle, comfortable stretch, not pain. If you feel any sharp pain, ease up on the stretch. Consistency is key; even a few minutes of stretching each day can make a world of difference.
| Stretch Name | Target Muscle Group | Instructions | Benefits |
|---|---|---|---|
| Hamstring Stretch | Hamstrings | Sit with legs extended, reach towards toes. | Increased hamstring flexibility, reduced lower back pain. |
| Quadriceps Stretch | Quadriceps | Stand on one leg, grab ankle and pull heel towards buttock. | Improved knee mobility, reduced risk of quadriceps strains. |
| Calf Stretch | Calves | Lean against a wall with one leg straight back, heel on the ground. | Increased ankle flexibility, reduced risk of calf strains. |
| Triceps Stretch | Triceps | Raise one arm overhead, bend elbow and reach down towards your upper back with your other hand. | Improved shoulder mobility, reduced risk of triceps strains. |
| Chest Stretch | Pectorals | Interlock fingers behind back, gently straighten arms. | Improved posture, reduced chest tightness. |
| Shoulder Stretch | Shoulders | Grab one arm above the elbow with your opposite hand and gently pull across your body. | Increased shoulder range of motion, reduced shoulder stiffness. |
| Child’s Pose | Back, hips, shoulders | Kneel, sit back on heels, fold forward, resting forehead on the mat. Arms extended in front. | Gentle back stretch, relieves stress and tension. |
| Neck Stretch | Neck | Gently tilt your head to one side, bringing your ear towards your shoulder. Hold, then repeat on the other side. | Reduces neck tension and stiffness. |
Benefits of Regular Stretching
Regular stretching isn’t just about post-workout recovery; it’s a crucial component of overall fitness and well-being. Consistent stretching improves flexibility, allowing for a greater range of motion in your joints. This increased flexibility translates to improved athletic performance, easier daily movements (think reaching for that high shelf without groaning!), and a reduced risk of injuries. By improving flexibility, you’re essentially making your body more resilient and less prone to strains and tears.
Think of it as preventative maintenance for your musculoskeletal system. Regular stretching also contributes to better posture, reducing the risk of back pain and other postural problems. Finally, stretching can help to reduce stress and improve mental well-being, promoting relaxation and reducing muscle tension associated with stress.
Nutrition and Recovery
Fueling your body right is as crucial to your at-home resistance training program as the workouts themselves. Think of your muscles like a high-performance engine – you wouldn’t put low-grade fuel in a Ferrari, would you? Proper nutrition provides the building blocks for muscle growth and the energy needed to power through your sessions, while also aiding in the recovery process.
Neglecting this aspect is like trying to build a sandcastle during a hurricane – a recipe for disaster.Proper nutrition plays a vital role in muscle growth and recovery. Consuming enough protein is essential for repairing and building muscle tissue after a workout. Carbohydrates provide the energy your muscles need to function effectively, while healthy fats support hormone production and overall bodily functions.
A balanced diet, rich in whole foods, is far more effective than relying on protein shakes and supplements alone. Remember, consistency is key – small, regular improvements to your diet will yield better results than sporadic attempts at drastic changes.
Macronutrient Intake for Muscle Growth
A balanced intake of macronutrients—protein, carbohydrates, and fats—is critical for muscle growth and repair. Protein provides the amino acids necessary for muscle protein synthesis, the process of building and repairing muscle tissue. Aim for around 1.6-2.2 grams of protein per kilogram of body weight daily. Carbohydrates replenish glycogen stores, providing energy for your workouts and preventing muscle breakdown.
Healthy fats support hormone production and overall health. Consider a diet rich in lean protein sources like chicken breast, fish, beans, and lentils; complex carbohydrates such as brown rice, quinoa, and sweet potatoes; and healthy fats from sources like avocados, nuts, and olive oil. A well-balanced meal might include grilled chicken breast with brown rice and steamed broccoli, providing a good balance of all three macronutrients.
The Importance of Sleep for Muscle Repair
Sleep isn’t just for the lazy; it’s the unsung hero of muscle recovery. During sleep, your body releases growth hormone, which is essential for muscle repair and growth. Aim for 7-9 hours of quality sleep each night. Consistent sleep deprivation hinders muscle recovery, reduces strength gains, and increases the risk of injury. Think of it like this: your muscles are like a finely tuned instrument; they need time to rest and recharge before they can perform at their best.
Lack of sleep is like leaving that instrument out in the rain – it’s going to get damaged.
Managing Muscle Soreness
That glorious post-workout soreness, often called Delayed Onset Muscle Soreness (DOMS), is a sign that your muscles are adapting and growing stronger. However, managing it effectively can enhance your recovery. Adequate hydration is crucial, as dehydration can exacerbate muscle soreness. Light activity, such as a gentle walk or foam rolling, can improve blood flow and reduce stiffness. Over-the-counter pain relievers can help manage discomfort, but remember to consult your doctor before using any medication regularly.
Finally, prioritize rest and allow your body sufficient time to recover between workouts. Don’t push yourself too hard, too soon. Remember, building muscle is a marathon, not a sprint.
Safety Precautions and Considerations
Let’s face it, even though your living room might seem like a safer bet than a crowded gym, home workouts still carry their own set of potential pitfalls. We’re not talking about accidentally launching a resistance band into your prized collection of houseplants (though, let’s be honest, that’s a possibility). We’re talking about injuries that could sideline your fitness journey faster than a dropped dumbbell.
Examine how simple strength training exercises for beginners at home can boost performance in your area.
So, let’s get smart about staying safe and sound while you sculpt that superhero physique.Proper form is your best friend, and its nemesis is injury. Think of it like this: bad form is like trying to build a skyscraper with wonky bricks – it’s going to collapse eventually. Mastering the correct technique for each exercise is crucial not only for effectiveness but also for avoiding strains, sprains, and other unwanted surprises.
We’ll delve into specific form tips for various exercises, ensuring you’re building muscle, not building up a trip to the doctor.
Potential Risks Associated with At-Home Resistance Training and Mitigation Strategies
Ignoring safety can turn your home gym into a hazard zone. Potential risks include muscle strains and sprains from incorrect form, overuse injuries from pushing too hard too fast, and even minor injuries from tripping over equipment or hitting a wall with a wayward kettlebell (yes, it happens). Mitigation involves proper warm-up and cool-down routines, gradually increasing intensity, ensuring a safe workout space free of obstacles, and listening to your body – pain is a signal, not a badge of honor.
Remember that gradual progression is key; Rome wasn’t built in a day, and neither is a rock-solid physique.
Guidelines for Proper Exercise Form to Prevent Injuries
Maintaining correct form requires focus and attention to detail. For example, during squats, ensure your knees track over your toes and your back remains straight to prevent knee and back injuries. When performing push-ups, maintain a straight line from head to heels to avoid shoulder strain. Using a mirror to monitor your form is extremely helpful. If you find yourself consistently struggling to maintain correct form, consider consulting a fitness professional for personalized guidance – a small investment in a consultation could save you from a major injury down the line.
Videos demonstrating correct form for each exercise can also be invaluable resources.
When to Consult a Healthcare Professional Before Starting a New Workout Program
Before embarking on any new workout routine, it’s always wise to chat with your doctor, especially if you have pre-existing health conditions like heart problems, joint issues, or back pain. This consultation isn’t about getting permission to work out; it’s about ensuring you’re starting safely and appropriately for your individual circumstances. They can offer personalized advice and help you identify any potential risks or modifications needed to keep you healthy and injury-free.
Don’t skip this step; it’s a small investment in your long-term health and fitness. Think of it as preventative maintenance for your body’s amazing machine!
Illustrative Examples of Exercises
Let’s ditch the gym membership and unleash your inner superhero with these at-home exercise demonstrations! We’ll cover the basics of proper form, ensuring you maximize results while minimizing the risk of injury. Remember, consistency and proper technique are key – think quality over quantity!
Squat
The squat, a fundamental movement pattern, targets your quads, glutes, and hamstrings. Begin by standing with feet shoulder-width apart, toes slightly outward. Engage your core (imagine bracing for a punch!), and lower your hips as if sitting back into a chair. Keep your back straight, chest up, and weight in your heels. Your knees should track over your toes, avoiding excessive inward or outward movement.
Inhale as you descend, exhale powerfully as you rise back to the starting position. For beginners, focus on maintaining good form even with a shallower squat. More advanced individuals can increase depth and add weight (such as holding dumbbells or a filled backpack). Variations include jump squats (adding an explosive jump at the top) or goblet squats (holding a weight close to your chest).
Remember to listen to your body and stop if you feel any pain.
Push-up
The push-up, a classic bodyweight exercise, works your chest, shoulders, and triceps. Start in a plank position, hands slightly wider than shoulder-width apart, fingers pointing forward. Your body should form a straight line from head to heels, engaging your core to prevent sagging. Lower your chest towards the floor by bending your elbows, keeping them close to your body. Inhale as you lower, exhale forcefully as you push back up to the starting position.
Beginners can modify this exercise by performing push-ups against a wall or an elevated surface, gradually decreasing the incline as strength increases. Advanced variations include decline push-ups (feet elevated) or plyometric push-ups (adding an explosive push-off at the top). Remember, maintaining proper form is more important than the number of repetitions.
Plank
The plank, an isometric exercise, builds core strength and stability. Begin in a push-up position, but instead of lowering your chest, rest on your forearms with elbows directly beneath your shoulders. Your body should form a straight line from head to heels, engaging your core, glutes, and legs. Hold this position, maintaining a neutral spine and avoiding sagging or arching.
Focus on controlled breathing throughout the hold. Beginners can start with shorter holds (e.g., 15-30 seconds) and gradually increase the duration. Advanced variations include side planks (holding the plank position on one side) or forearm planks with leg raises. Remember, the key is maintaining proper form throughout the entire hold.
Bicep Curl (Resistance Band)
This exercise targets your biceps. Stand on the middle of the resistance band with feet shoulder-width apart. Hold one end of the band in each hand, palms facing upwards. Keeping your elbows close to your sides, curl the weights towards your shoulders, inhaling as you lift. Exhale as you slowly lower the weights back to the starting position.
Adjust the band tension to suit your strength level – a thicker band provides more resistance. Variations include hammer curls (palms facing each other) or concentration curls (resting your elbow on your inner thigh).
Tricep Extension (Resistance Band)
This exercise targets your triceps. Stand on the middle of the resistance band with feet shoulder-width apart. Hold one end of the band in both hands, extending it overhead. Keeping your elbows close to your head, lower the band behind your head by bending your elbows. Inhale as you lower, exhale as you extend your arms back to the starting position.
Adjust the band tension to match your strength level. Variations include overhead tricep extensions (standing) or skullcrushers (lying on your back).
Closing Notes: At Home Resistance Training Program With Minimal Equipment
So there you have it – your passport to a stronger, fitter you, all from the comfort of your own home! Remember, consistency is key. Start small, listen to your body, and celebrate those tiny victories. Before you know it, you’ll be effortlessly crushing those burpees, feeling stronger than ever, and wondering why you ever wasted money on a gym membership.
Now go forth and conquer… your couch, your living room, and ultimately, your fitness goals!